Friday, September 27, 2019

Shami Kebab Recipe (Stovetop and Pressure Cooker Method)


Shami kebab are beef patties made with boneless beef, chana daal (split bengal gram), onion, spices and herbs. This recipe makes a large batch so eat some right now, and freeze the rest for later. 


There was a time when shami kebabs were reserved for special occasions – when guests are over or it was a fancy dinner at home. Those were the days when the meat for the shami kebab was painstakingly ground by hand with a sil batta. Similar in concept to a mortar and pestle, the sil is a flat stone and the batta is the cylindrical grinding stone that is used to ground spices, vegetables or in the case of shami kebab pieces of cooked boneless beef.

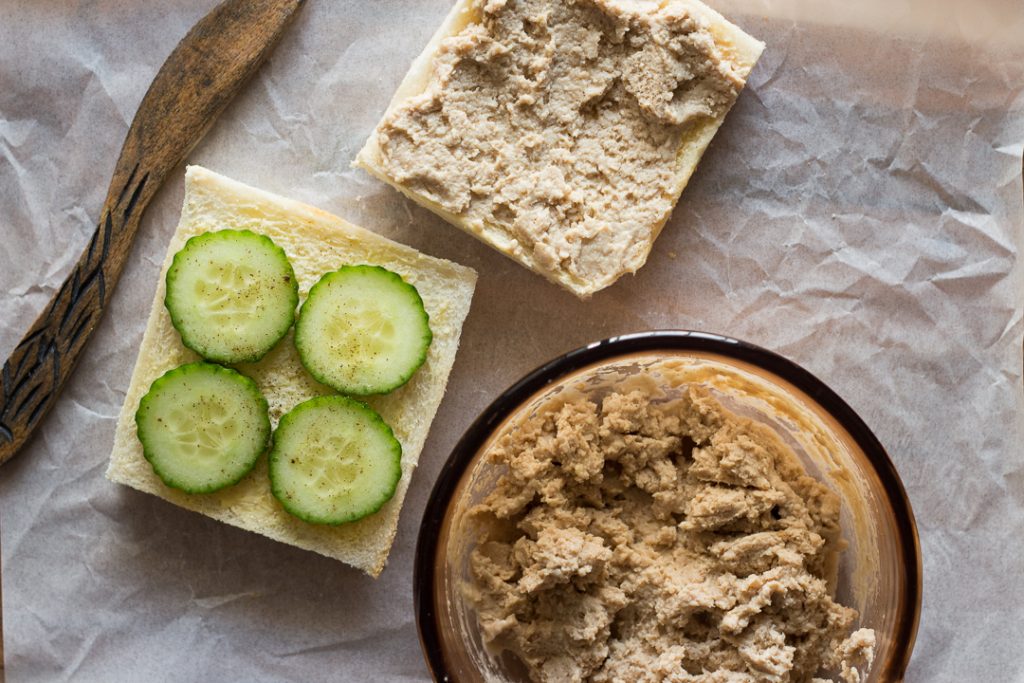
With the advent of the food processor, the process to make shami kebabs has become much easier and it’s typical for every Pakistani family to have a batch in the freezer. Just the thing for impromptu guests, a quick snack or dinner. They can be eaten as is (with chutney on the side of course), made into a sandwich, eaten with roti and chili garlic sauce (my favourite) or eaten on the side with daal chawal. 


How to make Shami Kebab?
  1. Boil diced boneless beef with onion, garlic, spices and soaked chana daal till tender. This can be done on the stovetop or pressure cooker. The mixture must be dry in the end, so be careful when adding the water for boiling.
  2. Pulse the meat and lentils mixture till shredded. Don’t process too much as you want the meat to have texture (or raisha as we call it in Urdu)
  3.   Pulse the hara masala (onion, coriander, green chilies, garlic and ginger) in the food processor.
  4.   Mix the hara masala with the meat; add an egg and breadcrumbs (if needed) and shape into kebabs. 
  5.   Fry and/or keep it in the freezer.

The origin of Shami Kebab 

The origin of shami kebab is attributed to a Mughal emperor who loved to eat, but couldn’t as he had lost all his teeth. So the cooks came up with the dish that we now call shami kebab – minced meat mixed with daal and spices ground into a paste, and then fried. Crisp on the outside, velvety smooth inside.

What’s your favourite way to enjoy shami kebab?

Looking for more Pakistani & Indian recipes for your weekly dinner inspiration. Check out the following:
  1. Ginger Chicken, Pakistani style
  2. Murghi ka Salan (Chicken curry with Onions and Tomatoes)
  3. Karahi Chicken
  4. Lobia ka Salan (Black eyed peas in curry)
  5. Aloo Gosht (Mutton Curry with Potatoes) – Stovetop & Pressure Cooker method.

Ingredients


For the beef mixture


  • ½ kg boneless beef diced
  • 1 cup chana daal split bengal gram or split brown chickpeas
  • 2 small onion
  • 8 - 10 garlic cloves
  • 1 inch piece ginger
  • ½ teaspoon cumin seeds
  • 2 teaspoon coriander seeds crushed (optional - coriander powder can be used instead)
  • 4 - 5 cloves
  • 4 black cardamom bari elaichi
  • 3 one-inch stick cinnamon
  • 15 - 20 black peppercorns
  • 8 - 10 round red chilies
  • 2 teaspoon salt

Hara masala (Fresh herbs)


  • 4 medium onion chopped into quarters
  • 2 inch piece ginger
  • 6 - 8 green chilies
  • 1 bunch coriander
  • 1 egg
  • 1/2 cup breadcrumbs optional (adjust as needed)
  • Oil for frying

Instructions


Stovetop Instructions


  1. Wash the chana daal (split bengal gram or split brown chickpeas) and soak for a few hours.
  2. In a large pot, add all the ingredients mentioned in the beef mixture (beef, whole spices, onion, garlic and ginger) except for the chana daal (split bengal gram or split brown chickpeas). Add water and put to boil.
  3. Once the beef is 50 - 60% done (about 55 minutes or so), add the chana daal and cook both of them together till beef and chana daal are tender, and water has dried. It will take about 1.5 - 2 hours for the beef to be tender. It’s important to make sure the water has evaporated else the shami kebab mixture will be wet. Remove the beef and daal mixture and let it cool. Remove the whole spices at this stage if you want.

Multi cooker / Pressure Cooker / Instant Pot Instructions


  1. Wash the chana daal and set it aside. Do not soak.
  2. Add all the beef kebab ingredients with 1 cup water and pressure cook for about 20 - 22 minutes. I use the Philips Viva 2137 multi-cooker, and this is the time that it takes me, but the time may differ based on the model you use.
  3. Release pressure and cook for a few minutes on saute / sear mode till the water evaporates and mixture is dry.
  4. I have noticed that when I soak and cook the chana daal in the pressure cooker, it can turn too mushy. That's why I add unsoaked chana daal. In case the daal isn't soft enough when you pressure cook it, soak it for an hour and then pressure cook with the beef

After cooking instructions


  1. Roughly chop the onions, ginger, green chilies and coriander. Set aside.
  2. In a food processor, add beef and lentils mixture and pulse till the beef is shredded. If you pulse too much, the mixture will become pasty so be careful. Remove and set aside in a bowl.
  3. In the same food processor add the roughly chopped green masala and pulse for a few seconds till finely diced.
  4. Add to the beef mixture and mix through. Taste and adjust seasonings, if required at this point.
  5. Add the egg and bread crumbs (if using) to the beef mixture. If mixture is too wet, add more breadcrumbs and/or flour.
  6. Shape into round patties, and set aside on a tray. This recipe will make about 20 - 24 shami kebab, so it's best to freeze them if you are not eating them right away.
  7. To fry the shami kebab heat oil in a frying pan. Cook for 2 - 3 minutes each side till golden brown. Turn the shami kebab only when they are brown on one side, else they can break apart.
  8. Enjoy hot with chai, with roti, chawal or in a sandwich.

How to freeze shami kebab


  1. Grease a baking tray. Shape the beef mixture into round patties, and keep on the baking tray ensuring that the patties don’t touch each other. Keep the shami kebab in the freezer for a few hours till frozen. Once the shami kebab are frozen, remove them from the tray and place in a plastic bag. Some people defrost them, but I just take them out of the freezer and fry them directly.

Recipe Notes


Soaking the chana daal
  • The reason for adding the chana daal later in the cooking process is that the beef takes time to cook. If both are added together, the chana daal can turn quite soft and mushy.
  • I have noticed that when I soak and cook the chana daal in the pressure cooker, it can turn too mushy. That's why I add unsoaked chana daal. In case the daal isn't soft enough when you pressure cook it, soak it for an hour and then pressure cook with the beef.

Chicken Spread Sandwiches or Chicken Sandwich Spread


These chicken spread sandwiches are a great option for lunch boxes, be it a school lunch box or for the office. Just spread it on bread, add sliced vegetables and cut into halves or triangles. Whatever you prefer! 
The first time I tried a chicken spread sandwich was from my friend’s lunch box – she had bought sandwiches to school and made me try them. That very day I asked my mother to get me a bottle for home, but as I started having it on a regular basis, I realised something. The chicken spread tastes good for the first 2-3 bites, but after that it starts getting a bit monotonous. And that’s because the brands available in the supermarket usually had far more mayonnaise than actual chicken.
A few weeks ago, I was craving those chicken spread sandwiches, and I ended up making this version for myself and later for a dawaat, making sure that this time around there was more chicken than mayonnaise!
These chicken spread sandwiches are a great option for lunch boxes, be it a school lunch box or for the office. Just spread it on bread, add sliced vegetables and cut into halves or triangles. Whatever you prefer! 
This chicken sandwich spread is open to countless variations – add some finely chopped herbs or peri peri spice for some kick. Pulse some carrots or maybe some celery and mix it in the chicken – perfect way to sneak in some vegetables for the kids (and even adults!). You can keep the sandwich spread in the fridge for a couple of days – use it for lunch boxes, and it’s also an excellent option for a high-tea party, a picnic or just with your evening chai. 

Were you a fan of chicken spread sandwiches growing up?

Some other snack recipes that you can try are:
  1. Aloo Pakoras or Potato Fritters

  2. Potato and Chicken Croquettes

  3. Keema Samosa

Monday, September 16, 2019

Steps To Make Korean Chicken Recipe, Homemade Chicken Nugget Recipe, Best Chicken Nugget Recipe

Korean Chicken Nugget Recipe

This Korean Chicken Nugget recipe is guaranteed to make you excited at breakfast with your beloved family. Come on, see and try the recipe directly.


Ingredients For Making Chicken Nugget Recipe

      1. Chicken Nugget Material

  • Skinless chicken breast fillet, diced 3 cm 300 g
  • Garlic, finely chopped 3 cloves
  • Salt 2 Tsp
  • White pepper powder 1 Tsp
  • Grated ginger ½ tsp
  • Chicken eggs beat 2 grains
  • Multipurpose wheat flour 120 g
  • Oil, for frying 300 ml

    2. Korean style sauce

  • Blueband Multipurpose 5 tbsp
  • Spicy sweet chili sauce ready to eat 135 g
  • 80 ml of honey
  • Salted soy sauce 2 tbsp
  • Lemon juice 3 Tsp

Steps To Chicken Nugget Recipe

  1. Nugget: in the container, mix well chicken, garlic, salt, pepper, and ginger. Let stand for 15 minutes until the seasoning permeates.
  2. Roll the chicken into flour, then dip it into the beaten egg. Then roll it back into the flour.
  3. Fry the chicken in hot & lots of oil gradually until it's cooked and golden. Lift, drain.
  4. Sauce: heat the Blueband in the pan. Add chili sauce, honey, soy sauce, and lemon juice. Bring to a boil.
  5. Solution: put the fried chicken into a skillet with the sauce. Stir and cook for a while until the spices absorb. Lift. Serve immediately.

How To Make Fried Cabbage At Home Easily | Fried Cabbage Recipes, Indian Recipe

Fried Cabbage


A delicious (healthy!) Alternative to the classic fries, and possibly the tastiest way to cook cabbage. 


Ingredients For Making Fried Cabbage

  • Purple Cabbage 200g
  • 1 tablespoon extra-virgin olive oil
  • 1 tablespoon of sea salt
  • 1 tablespoon fresh rosemary


Total Time Required 


  1. Preparation time: 10 min
  2. Cooking time: 20 min

Instructions For Making Fried Cabbage

  1. Preheat oven to 120 ° C.
  2. Mix the salt and rosemary in a small bowl and set aside.
  3. Wash and dry cabbage thoroughly. Remove the cabbage stems and cut the leaves into large pieces.
  4. Put them in a bowl and pour the olive oil. Make sure the leaves are evenly covered and season with the rosemary salt to taste.
  5. Arrange the leaves in a single layer on a large baking sheet
  6. Bake for 20 minutes or until crisp.
  7. Place the baking dish in a rack to cool. To serve, transfer the chips in a large bowl or individual bowls.


2nd Method For Making Fried Cabbage


Ingredients

  • 1 packet of cabbage
  • Frying oil
  • Salt to taste

Method of preparation

Cut the cabbage leaves very thin (cabbage butter, cut angel hair type). Boil the oil and let the cabbage, well distributed in the pan, fry for 30 seconds. Remove and dry cloth or absorbent paper. Season with salt to taste.

How To Make Delicious Cassava Chips - Recipe for Making Cassava Chips

How To Make Delicious Cassava Chips

Recipe for How to Make Cassava Chips - Hello everyone, see you again at ResepKakak, this time I want to share a recipe that is certainly liked by any food lover, called Cassava Chips. Actually, this food is more appropriate as a snack, and less suitable if we call it the daily food. The problem is that every day you eat, it can get hot, hehe.


This one cassava chips, in my opinion personally, it feels like it's not inferior to the taste of cassava chips that we usually buy in supermarkets or in food stalls, bro. We can feel the crunchy crisps, every bite.

If we talk about cassava chips, then we will talk about typical foods with crunchy and very suitable to be eaten when the weather is cold or even at night accompanied by family when watching our favorite TV broadcasts. To make cassava chips, you don't need to be proficient in cooking, because the main thing we need is to try, and of course we also need cassava to make cassava chips. Well, let's go, let's see, how about an easy way to make these tasty and crunchy cassava chips.


Cassava Chips Material:

  • 1 kg of cassava
  • 5 tbsp Salt
  • 5 garlic cloves (puree)
  • The right amount of oil

  • Steps to make cassava chips:

    • The main thing you need to make sure is that you have prepared all the ingredients above.
    • Peel cassava while cleaning using running water, or you can wash it all by using a basin.
    • Soak the clean cassava with salt water and ice water. Let stand for 30 minutes.
    • Drain cassava. And let it dry slightly. (It can also be fried immediately, but the water in cassava will definitely splash, so be careful bun).
    • Heat the oil and put the cassava with cooking oil over medium heat.
    • After the chips become crispy and cooked, remove and set aside.
    • Let the cassava chips cool slightly, and be careful if there are children nearby because the cassava is definitely very hot.
    • After a bit cold, cassava chips are ready to be served and eaten.

    Tip: 

    This cassava chips can last a long time, provided you put the jar so the quality of cassava chips is still good. If the taste of cassava chips is less salty, you can sprinkle more salt, or you can add more spices to your liking.

    Good luck.

how to make delicious avocado pudding - avocado pudding Recipe

how to make delicious avocado pudding


Recipe for Making Avocado Pudding Delicious - Hello mother, see you again after a long vacuum, there are a lot of thesis activities, and thank God, I have graduated, so now I can focus on cooking, hehe. Now on this occasion, I will share a few delicious pudding recipes. Well, the story is that in the past week, my mother wants to eat pudding, now it's because the usual chocolate pudding I made seems to be bored, I created a pudding this time with avocado flavor. It turns out it tastes good! Not inferior to the usual chocolate pudding I made. Indeed, it can't compare the taste of chocolate with avocados, but the avocado pudding taste is very unique, and of course, children will also like the taste of this delicious pudding as a snack in the afternoon.


The green color of the avocado pudding turned out to provide extra freshness in the taste. The soft and tasty portion of the pudding will be the dessert that you will wait for after dinner for sure. Besides being delicious, this Avocado has many benefits, you know! One of the uses of avocados is maintaining heart health. The story has a story, first when I went to the clinic near the house with my father, the doctor told me to eat avocados, he said it was good for heart health. Now that's what the doctor said. Many people say that doctors say 20% can be trusted. But if we just can't believe the doctor's words, who else should we make as a benchmark in a healthy life?


Recipes for Making Delicious Avocado Pudding


Now, rather than the unclear story of stale, let's just peek at the recipe for making avocado pudding along with the ingredients needed.

Avocado Pudding Recipe ingredients


  • 1 bks of gelatin powder
  • ½ liter of clean water
  • ¼ kg of avocado, puree
  • 200 cc of vanilla milk, sweetened thick
  • 3 eggs, take the white part
  • Adequate sugar
  • The green coloring is sufficient (maybe missed, to live healthier).

Steps To Make Delicious Avocado Pudding


First of all, we have to do is heat the pan that we have filled with half a liter of water, and add it with the avocado ingredients that we have pureed before. Add green artificial coloring, granulated sugar, vanilla sweetened condensed milk and of course gelatinous powder. Mix well until and wait until boiling and cooked.

While waiting, we take the container that contains 3 eggs and shake. After that pour the results of the cocked gelatin into the egg white container. Stir evenly slowly.

After the mixing is complete, all we have to do is print the pudding by pouring it into the pudding mold. For the pudding mold, it's up to the mother, what is the shape, the good mold is well which is heat resistant and not sticky when it cools later. After that, we put the agar pudding in the freezer or refrigerator. This process can also be done after the pudding has cooled slightly so that our freezer or refrigerator is not damaged quickly, hehe.

After the pudding in the refrigerator is ready and chewy, the delicious avocado pudding is ready to be served with your closest loved ones and relatives.

Tips:

This avocado pudding is very suitable to be enjoyed as a dessert, therefore we can serve it after finishing dinner especially children of course love this chewy and super tasty food. For a better taste, we can combine the avocado pudding with the addition of chocolate on top, of course, to make it more attractive and add flavor to the pudding itself.

Recipe for Making Sweet Banana Chips - Sweet Banana Chips Recipe

Sweet Banana Chips Recipe


Recipe for How to Make Sweet Banana Chips - Hello Bun, see you again with ResepKakak, this time I want to share the recipe for Banana Chips which is certainly liked by children. I want to share this recipe because I personally love banana chips.

Who doesn't like banana chips? I would love to ask all the children in Indonesia, but unfortunately, the results will definitely be many who disagree that banana chips are delicious. I personally really like banana chips, maybe because my childhood was always treated to mother-made banana chips, so I want children today to try this delicious banana chips. Because if you pay attention to children's snacks nowadays which I think is a bit extreme, the problem was some time ago, when the new year holiday yesterday, I returned home, and met 2-3 who were distant brothers, and when I asked, what food did you like the most and they answered the macaron, or croissant (bread name). Yes, children, but already experts with good bread or cake terms, maybe they are always treated to these sweet and delicious foods so these chips might be thought of in the old days.

Banana chips are very simple chips, and very tasty to eat especially accompanied by a cartoon on TV (if I used to like that, eat banana chips accompanied by Doraemon cartoon or dragon ball cartoon) haha. Well, instead of listening to me I confide at length, let's hunt just how to make it, simple and certainly very easy to make.

Sweet Banana Chips Material

  • 1 old banana comb
  • 6 tablespoons of sugar
  • 1 tsp betel lime
  • The right amount of oil
  • Steps to make Sweet Banana Chips


Steps to make Sweet Banana Chips:


  • Peel all existing banana skins.
  • Slice all the bananas into thin, thin metal coins.
  • Prepare a clean container, and pour 1 liter of water into it.
  • Add 1 teaspoon of betel lime and dissolve with the banana slices.
  • Soak the banana slices for about 30 minutes (if done correctly, usually the water will change color to slightly brownish, the sign is that the banana juice has come out).
  • Lift the banana slices to another container, and wash thoroughly, and drain.
  • While we wait for the banana to dry slightly, we boil the water with sugar that was prepared earlier.
  • Heat the oil over medium heat, if the oil is already hot, take about 5-6 bananas to fry, we will fry in that portion, you can add more, but make sure you don't let the banana become black and burnt.
  • Occasionally stir the banana and when the banana is about to dry, we reduce the heat, and pour 1 spoonful of vegetables (about 3 tbsp) of sugar solution that we have prepared earlier, and stir slowly.
  • Fry the banana again until golden yellow.
  • Remove and drain then dry in one container, (if I use traditional bamboo vegetables. You can use a large plate to hold it while waiting for the chips to dry).
  • Repeat until all the bananas are fried.
  • Banana chips are ready to be served while warm.


Tips: 

This banana chips can last a long time, provided you put the jar so that the quality of the banana chips is still good. Children will definitely like this crispy and sweet banana chips, but of course, you also have to pay attention and control so you don't consume too much and have to drink enough water to not heat up.

Good luck.